5/08/2018

Matcha Bread With Red Bean And White Chocolate 抹茶红豆与白巧克力面包


Its currently 1:52am right now and I'm entering a blog entry about a bread I made yesterday. How weird. I mean I don't usually blog this late but I guess somedays you just have that feeling to pour out your thoughts. Anyways, its been almost a year since I touched bread dough because I always had to sacrifice my sleep to keep an eye on the proofing. Oh, how naive. Prior to this baking session, I did more intense research about bread dough and their specifics so that I can control my dough better and plan my time out. Yes, baking bread requires you to manage your time if you want to make full use of the proofing time.  I was also more motivated to bake during the weekends once I started work, I wanted to be more productive as possible. So I began baking at 2pm on Sunday and did the measurements like how I always baked my cake and mix them up. I did panicked when the dough became super gooey when I added in butter but it was nothing, everything turned out fine once I kept on kneading.

Okay, this session also made me understand more on how kneading increases the gluten content in the flour as our kneading stretches the gluten found in dough (if I'm not wrong heh). When it comes to kneading, I literally use my whole body weight to knead for the fullest potential and I was drenched from sweating lol. I checked on the dough to see if its ready during kneading intervals — a "window pane" test, whereby the dough is almost translucent when slowly stretched. If it breaks right away, I would have to knead another 10mins (and I think it happened almost 10000 times, jk).

- proofing time -

Everything was alright until the folding in of red beans and white chocolate part. I was suppose to roll out the dough to a 10cm X 27 Cm and place a tbsp of red bean and white chocolate. Guess what? The red bean I bought was to mushy and watery that it caused the first dough to be soggy and messy that it turned into a scone like shape lmao (I gave up). I learnt my lesson and allow the water to drain off from the red bean and then placed it as said for the second dough.
It worked, kinda.

It didn't turned out super perfect or anything but I can say it was hard work. When I ate the slices of bread the next morning, it was pretty good tho. It has the subtle matcha flavour paired with the sweet red beans and white chocolate. Perfect (for a first try heh).

I would say that I don't usually share my baking mistakes here. However, as of 2018, I should embrace them and learn a thing or two from those failures. A new start maybe?


Read More

9/23/2016

Strawberry Roll Cake | 草莓瑞士卷


Hi guys. Sorry for being hiatus for such a long time. School had me crazy and I haven't bake for a really looong time, and I do miss it.

A little story to share.

Last year, there was water maintenance from 11am-5pm. So from 11am onwards, there will be no water supplied to my home. Water is precious and I try to reduce the use of it from time to time to save water, but without it, I don't think I can make it alive. I woke up approximately at 10am leaving me to only an hour to get anything related to water done. I prepared lunch, bathe and get ready, filled up 2 bottles (which I regret because I needed more than that), washed the dishes, water the plants and washed some clothes. All within an hour and I felt like so accomplished hahahahah. It was intense and somehow nerve-wrecking because I have to be prepared to face the down side of having no water for the next 6 hours. Just when I thought everything was perfectly okay and I am ready to combat anything that will bring me down, I touched raw egg whites while cooking. I went to the toilet but I can't wash my hands, I drank all the bottled water and it was only 4pm. I feel so unhygienic that day, and I'm cringing right now.

Anyways,
Time check: 6pm (Me: Okay, there shall be water!)
Opens the tap at the bathroom, nothing gushes out.
Opens the tap at the kitchen, nothing. Are you kidding me right now.
Opens the shower knob, nope. No way no way.

    
 (CR: Image:  Tumblr, lifeistooshort-bebrave )

My class starts at 7pm so I went to school in a mess. Luckily, and of course, the school amenities had water coolers. My mom reached home and went through the emotions I faced in the earlier part of the day. Whenever I playback what happened, how I find myself reacting to that day was quite embarrassing and amusing. Yeap. The end.


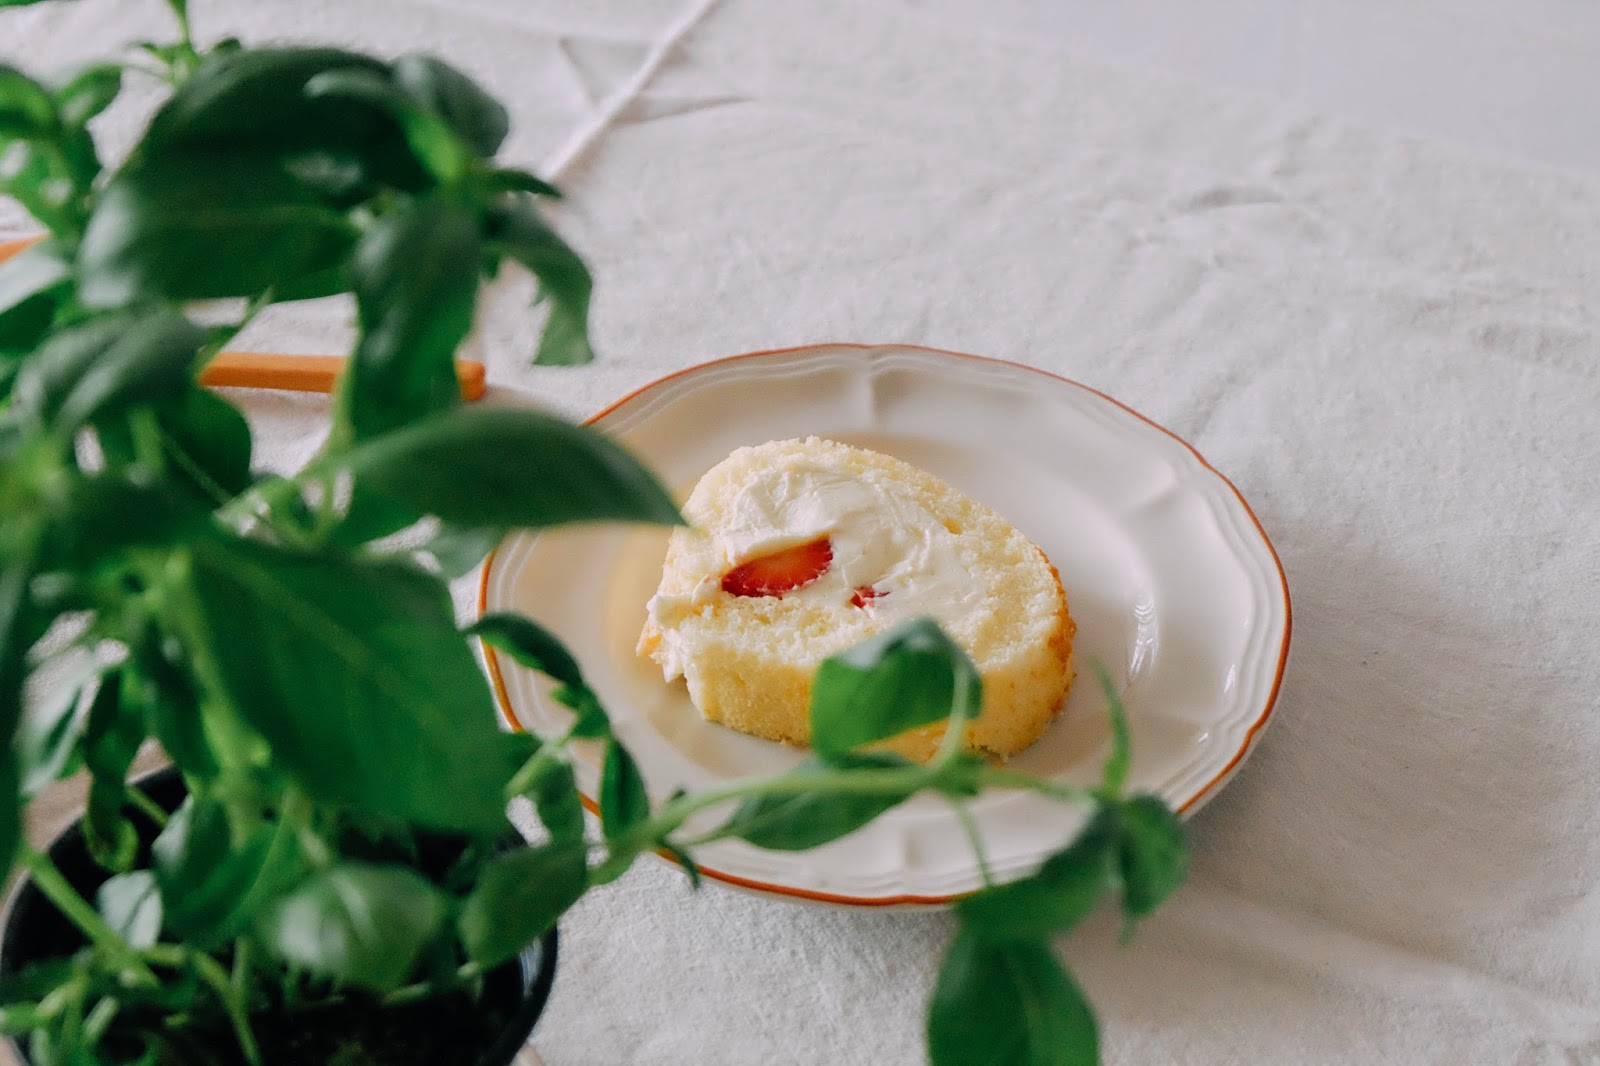


I've always wanted to give strawberry roll cake a try so that I don't have to rush to the bakery nearby to grab this cake for Sundays. With strawberries in season, the amount of recipe with strawberries are endless. So much so that, strawberry roll cake is so much more worth trying. Made this cake along with Li Xuan and Pei Shan again, whereby baking became bonding sessions. We even cooked dinner and talked through the night and laughed so hard at our embarrassing moments back when we were kids. 9 years have passed but how we felt being an 8 years old, how we questioned the adults, how we cherished every time we got to play, how we studied hard together, how going to the nearby park was such a luxurious thing for us, everything is still a vivid memory. 

This cake was a perfect end for the day, and added just the right amount of sweetness we needed while we recollect on our childhood days. I think its pretty decent to invite your friends along with you to make this cake because it has lots of involvement especially when it comes to cutting the fruits, assembling the cake, whipping up cream. In the end, everyone gets to enjoy the fruits of their labour! 


Ingredients:

4 egg yolks
1 1/2tbsp caster/ ultrafine sugar
3 tbsp milk
3 tbsp vegetable oil
1/2 tsp vanilla extract
1/4 cup  all purpose flour
3 tbsp corn starch
4 egg whites
a pinch of salt
3/8 teaspoon cream of tartar
4 1/2 tbsp caster/ ultrafined sugar – sifted

1/2 cup whipping cream (35 – 40% fat)
1 1/2 tbsp caster/ ultrafined sugar – sifted
A handful of strawberries

Directions:

1. Preheat oven at 170°C.
2. Stir egg yolks and add 1 1/2 tbsp caster sugar. Mix till light and fluffy.
3. Add in milk, oil, vanilla, and mix well with yolk-sugar mixture.
4. Sift in cornstarch and flour, mix till smooth.
5. In another bowl, whip egg whites and the remaining sugar (4 1/2 tbsp) till soft peaks form, and gradually holds itself when you lift up the whisks.
6. Fold egg whites into egg yolks and mix till smooth. Batter should not be thin and runny.
7. Pour batter into a baking pan lined with parchment paper. Bake for about 25-30 mins, until cake turns golden brown.
8. Remove pan from oven and let the cake cool down.
9. For the fillings, whip the whipping cream with the sugar till peaks form. Avoid over-mixing or it will curdle.
10. Cut strawberries into pieces.
11. Once the cake is cooled down, remove from pan and place on parchment paper for rolling later. Spread whipped cream over it. Leave about 2 inches at the 2 edges empty. Put fruits over the cream.
12. Carefully lift one edge first and then fold over to roll. Roll confidently and quickly to prevent breaking the sponge cake.
13. Wrap with cling film in its "sushi" shape and refrigerate for about 3 hours.
14. After 3 hours, remove plastics and paper. Cut and serve!

材料:
4 个蛋黄
1 1/2tbsp 糖
3tbsp 牛奶
3 tbsp 植物油
1/2 tsp 香草精
1/4 cup 面粉
3 tbsp 玉米淀粉
4 个蛋白
少许盐
3/8 tsp 塔塔粉
4 1/2 tbsp 糖 (过筛)
1/2 cup 鲜奶油
1 1/2 tbsp 糖 (过筛)
适量 草莓

作法:
1. 将烘炉预热于170°C。
2. 将蛋黄和1 1/2 tbsp 糖搅拌至蓬松。
3. 然后,把牛奶,油,与香草精搅拌进蛋黄。
4. 将玉米淀粉与面粉一起过筛,然后倒进蛋黄。搅拌成均匀。
5. 在另外一个碗里,将蛋白与4 1/2 tbsp 糖搅成软峰形式,拿起烘烤扫时,蛋白不会掉下来。
6. 将蛋白轻轻的搅拌进蛋黄,搅拌均匀。面糊不应该薄也不是水水的。
7. 将面糊倒入蛋糕模,烘烤大概25-30分钟直到蛋糕呈现金黄色。
8. 把蛋糕取出,让蛋糕冷却
9. 将鲜奶油与糖来打发变成奶油霜。
10. 切草莓成小片。
11. 蛋糕冷却后,把蛋糕放在烘焙纸上。在蛋糕上涂抹奶油霜,在最远的两旁留两寸。将水果撒上。
12. 小心提起蛋糕的一边, 然后开始卷。带有自信卷因为这样卷的时候,比较快也就不会让蛋糕裂成两半。
13. 将蛋糕像寿司一样包住,放在冰箱3hr。
14. 3hour 过后,取出,切成厚片,enjoy!


其实我从一开始就很想尝试做草莓瑞士卷,但就是不太敢下手。终觉得很困难,觉得是个遥不可及的日常甜点,害怕会毁了完成作品。既然现在是草莓的季节,而且有各种各样的草莓烘培料, 这就更不能错过了。在草莓最香甜的时候烘培,还真是人生享受。又与佩珊和俐璇一起烘培,这已逐渐变成了我们每一次相聚都会期待的原因。过后, 我们不但在佩珊的小厨房里一起做了晚餐,还继续做豆花塔。虽然已夜深人静,但我们的笑声填补了晚上的宁静。每当想起我们还小时所做过的蠢事,一定会让我们笑破肚皮。我们一起经历过的一切,还历历在目 — 我们8岁时的想法,我们一起向大人的疑问, 一起珍惜能够玩耍的时间,一起用功读书,能够到公园玩耍是一种奢侈。

这蛋糕超适合作为一天的完美结尾。邀请朋友一起做这蛋糕就不应该错过了,因为不只需要切水果,还得搅拌与组织。到最后,大家都能尝到所付出的成果。草莓与奶油搭配真的草好吃的!!


Read More

2/10/2015

The art of baking


Baking is like magic

A cup of flour, a speck of sugar, cubes of butter, spoons of baking powder and soda. Bits and bobs of raw ingredients somehow allow the end of the day to be either bitter or sweet. When it comes to baking, concentration is key. The faith of whether the end product would be good must be strong right from the beginning. If you decide that the cake you are going to make would not be as good as the recipe, then it would not be. However, it is not wrong to experiment with the amount. I am often chaotic and messy when it comes to handling yeast. And if the bread looks inedible to me, I make sure the next time, no more playing around. Similarly, how you treat every single ingredient whether its an egg or some chocolate chips, does matter. Try not to belittle the power of salt although the amount in cake recipes are minimal. It actually uplifts its flavour. 

So how is baking like magic? The magic I'm talking here are those in the Fantasy World, whereby a raise of a wizard's wand can change a frog to a handsome prince. What?! Likewise, for bakers, they do '' magic '' through food. A mix of the chunk of ingredients with their spatula and whisk ( their wands ) transforms something out of nothing. 

    " A cake/bread out of some flour, eggs and butter?! Nah. "

In the oven, things react and bounces off each other. You cannot do anything but stare at it as it solidifies and expand. Each grain and every gap is filled. This is where magic occurs once again. *POOF*. Out comes pastries/cakes/bread/anythingyoucanthingof , and you indulge into haven. The only thing that differs Magic from baking - It is real. You can taste, smell, see and even hear everything that is happening in baking. It is not just a visual illusion. Magic makes people surprised, amazed, taken aback, impressed and lastly, happy. And through the flavours and the process of baking, it leaves people the same way it did as magic. 

Enjoy baking! xx


Read More

2/07/2015

Lemon Bundt Cake


This cake was made on National Day last year and I still remember the tangy feeling it left on my tongue. Lemons are a versatile ingredient and works perfectly in cakes and especially when squeezed on fish. Also, the amount of eggs you've got to use is not a joke. 6 eggs for a cake?  It actually made me investigate on the shells, texture and freshness of an egg even more. I was rushing to my relative's house that day and used this cake to celebrate the nation's birthday. Everyone's face expressed a multitude of emotions as the cake was packed with being sour, bitter yet sweet. The kids did detest the sting of the lemon but it is life. When life gives you lemon, make them into a cake and sting those kids. 

Lemon Bundt Cake

Serves 12
Adapted from Martha Stewart

Ingredients:

1 cup (2 sticks) unsalted butter, room temperature, plus more for pan 
3 cups all-purpose flour (spooned and leveled), plus more for pan 
2 tablespoons finely grated lemon zest and 1/3 cup fresh lemon juice (from 2 lemons) 
1 teaspoon baking soda 
1 teaspoon salt 
2 1/2 cups granulated sugar 
6 large eggs 
1 cup sour cream

Directions:

1. Preheat oven to 350 degrees. Butter and flour a 12-cup Bundt pan. In a medium bowl, whisk together flour, lemon zest, baking soda, and salt; set aside.

2. Using an electric mixer, beat butter and granulated sugar on medium-high until light and fluffy, 4 to 5 minutes. Add eggs one at a time, beating well after each addition; mix in lemon juice.

3. With mixer on low, alternately add flour mixture, sour cream, and lemon juice, beginning and ending with flour mixture; mix just until incorporated (do not overmix). Spoon batter into prepared pan and smooth top with a rubber spatula. Firmly tap pan on a work surface to level batter.

4. Bake until a toothpick inserted in center of cake comes out clean; 55 to 60 minutes (if cake browns too quickly, tent loosely with aluminum foil). Let cake cool in pan 30 minutes, then turn out onto a rack to cool completely. (To store, wrap cake in plastic and keep at room temperature up to 3 days.) Poke holes all over the cooled cake, and brush with lemon syrup. If the cake does not absorb all the syrup at once, allow to sit about 20 minutes before continuing to brush with any remaining syrup.

Enjoy!
Read More