4/26/2018

Green Tea Madeleines 抹茶マドレーヌ


Madeleines, which are also known as French Tea Cakes, do sound pretty fancy. I was intimidated by how it looked at first, with its delicate shell shaped and curves on the surface. However, it turnt out to be the easiest bakes I've ever done! It is like a mini cupcake/muffin but much more fluffy and also shaped as classic shells that is just right for every bite. The pan used for baking madeleines contributes greatly to how perfect the curves are baked! Its a slight bitterness but it just so matches perfecty with desserts, like sweet stuff, so Matcha all the way! Its been quite a while since I baked these little cakes as I've been experimenting on other recipes but it feels good to be back. That day was a weekend whereby I baked some cake for my family to enjoy as per usual, and also to take a break and have something sweet to end of the week before we start our busy lives again. Not too fancy or anything extravagant, just a simple quiet evening.


Recipe adapted from Just One Cookbook.


Read More

9/23/2016

Strawberry Roll Cake | 草莓瑞士卷


Hi guys. Sorry for being hiatus for such a long time. School had me crazy and I haven't bake for a really looong time, and I do miss it.

A little story to share.

Last year, there was water maintenance from 11am-5pm. So from 11am onwards, there will be no water supplied to my home. Water is precious and I try to reduce the use of it from time to time to save water, but without it, I don't think I can make it alive. I woke up approximately at 10am leaving me to only an hour to get anything related to water done. I prepared lunch, bathe and get ready, filled up 2 bottles (which I regret because I needed more than that), washed the dishes, water the plants and washed some clothes. All within an hour and I felt like so accomplished hahahahah. It was intense and somehow nerve-wrecking because I have to be prepared to face the down side of having no water for the next 6 hours. Just when I thought everything was perfectly okay and I am ready to combat anything that will bring me down, I touched raw egg whites while cooking. I went to the toilet but I can't wash my hands, I drank all the bottled water and it was only 4pm. I feel so unhygienic that day, and I'm cringing right now.

Anyways,
Time check: 6pm (Me: Okay, there shall be water!)
Opens the tap at the bathroom, nothing gushes out.
Opens the tap at the kitchen, nothing. Are you kidding me right now.
Opens the shower knob, nope. No way no way.

    
 (CR: Image:  Tumblr, lifeistooshort-bebrave )

My class starts at 7pm so I went to school in a mess. Luckily, and of course, the school amenities had water coolers. My mom reached home and went through the emotions I faced in the earlier part of the day. Whenever I playback what happened, how I find myself reacting to that day was quite embarrassing and amusing. Yeap. The end.


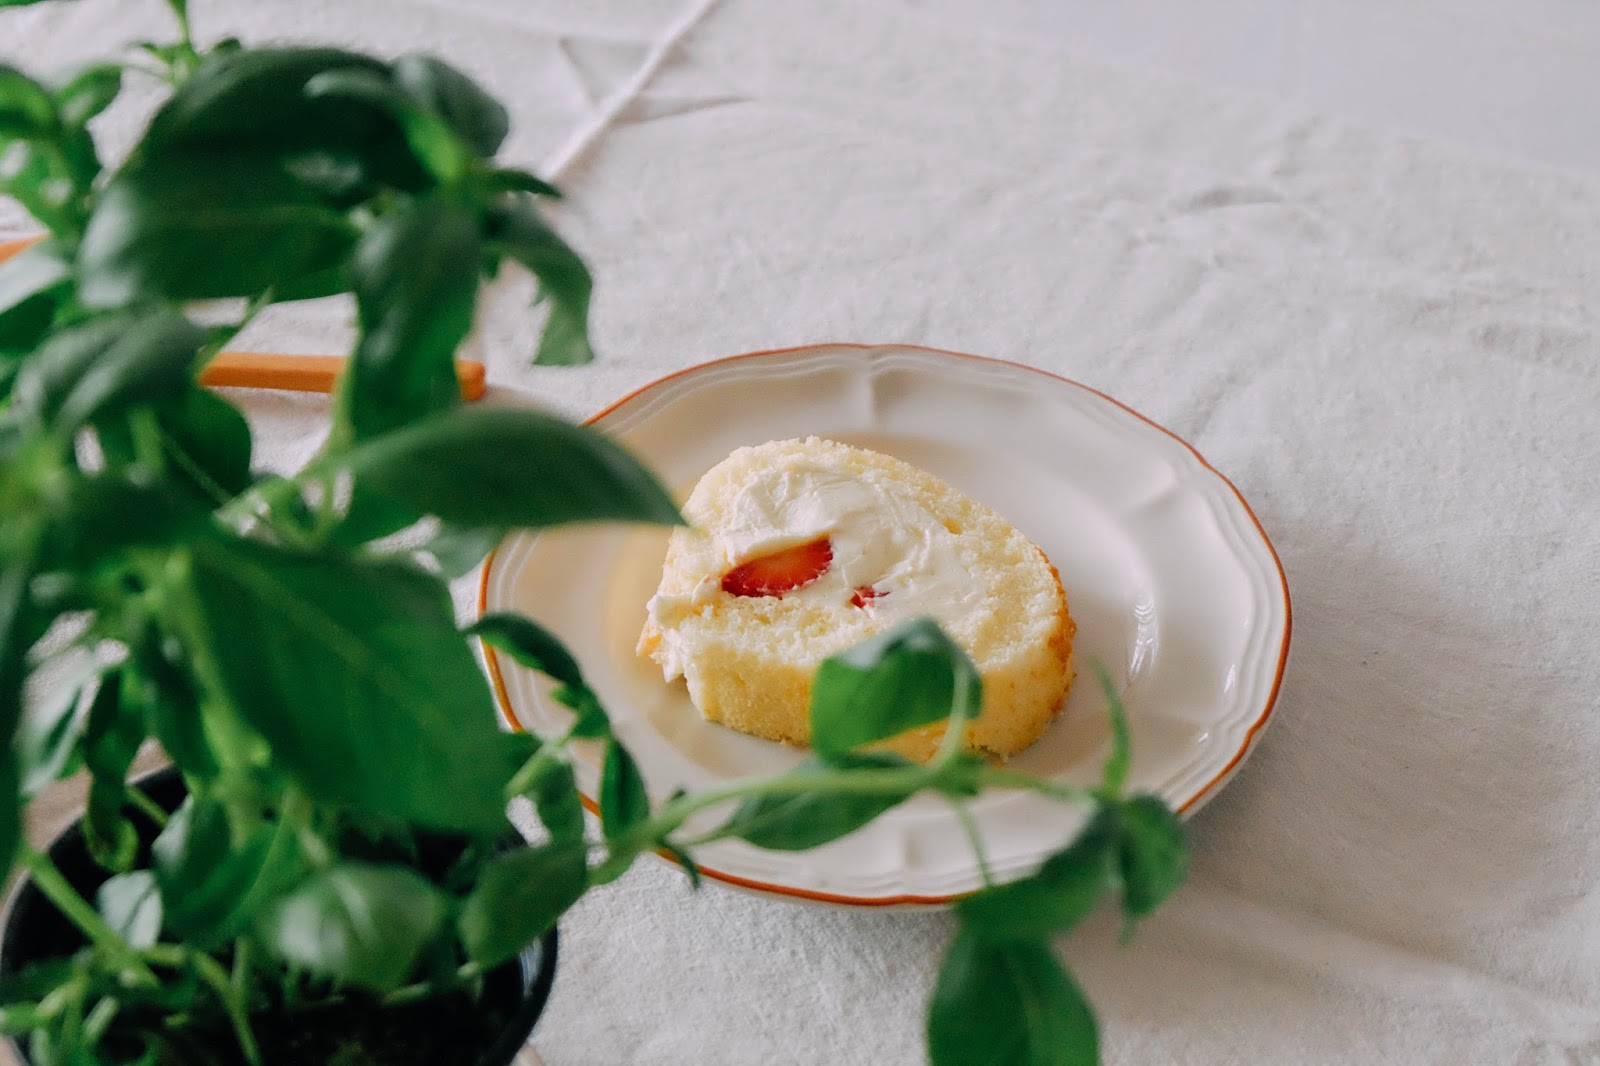


I've always wanted to give strawberry roll cake a try so that I don't have to rush to the bakery nearby to grab this cake for Sundays. With strawberries in season, the amount of recipe with strawberries are endless. So much so that, strawberry roll cake is so much more worth trying. Made this cake along with Li Xuan and Pei Shan again, whereby baking became bonding sessions. We even cooked dinner and talked through the night and laughed so hard at our embarrassing moments back when we were kids. 9 years have passed but how we felt being an 8 years old, how we questioned the adults, how we cherished every time we got to play, how we studied hard together, how going to the nearby park was such a luxurious thing for us, everything is still a vivid memory. 

This cake was a perfect end for the day, and added just the right amount of sweetness we needed while we recollect on our childhood days. I think its pretty decent to invite your friends along with you to make this cake because it has lots of involvement especially when it comes to cutting the fruits, assembling the cake, whipping up cream. In the end, everyone gets to enjoy the fruits of their labour! 


Ingredients:

4 egg yolks
1 1/2tbsp caster/ ultrafine sugar
3 tbsp milk
3 tbsp vegetable oil
1/2 tsp vanilla extract
1/4 cup  all purpose flour
3 tbsp corn starch
4 egg whites
a pinch of salt
3/8 teaspoon cream of tartar
4 1/2 tbsp caster/ ultrafined sugar – sifted

1/2 cup whipping cream (35 – 40% fat)
1 1/2 tbsp caster/ ultrafined sugar – sifted
A handful of strawberries

Directions:

1. Preheat oven at 170°C.
2. Stir egg yolks and add 1 1/2 tbsp caster sugar. Mix till light and fluffy.
3. Add in milk, oil, vanilla, and mix well with yolk-sugar mixture.
4. Sift in cornstarch and flour, mix till smooth.
5. In another bowl, whip egg whites and the remaining sugar (4 1/2 tbsp) till soft peaks form, and gradually holds itself when you lift up the whisks.
6. Fold egg whites into egg yolks and mix till smooth. Batter should not be thin and runny.
7. Pour batter into a baking pan lined with parchment paper. Bake for about 25-30 mins, until cake turns golden brown.
8. Remove pan from oven and let the cake cool down.
9. For the fillings, whip the whipping cream with the sugar till peaks form. Avoid over-mixing or it will curdle.
10. Cut strawberries into pieces.
11. Once the cake is cooled down, remove from pan and place on parchment paper for rolling later. Spread whipped cream over it. Leave about 2 inches at the 2 edges empty. Put fruits over the cream.
12. Carefully lift one edge first and then fold over to roll. Roll confidently and quickly to prevent breaking the sponge cake.
13. Wrap with cling film in its "sushi" shape and refrigerate for about 3 hours.
14. After 3 hours, remove plastics and paper. Cut and serve!

材料:
4 个蛋黄
1 1/2tbsp 糖
3tbsp 牛奶
3 tbsp 植物油
1/2 tsp 香草精
1/4 cup 面粉
3 tbsp 玉米淀粉
4 个蛋白
少许盐
3/8 tsp 塔塔粉
4 1/2 tbsp 糖 (过筛)
1/2 cup 鲜奶油
1 1/2 tbsp 糖 (过筛)
适量 草莓

作法:
1. 将烘炉预热于170°C。
2. 将蛋黄和1 1/2 tbsp 糖搅拌至蓬松。
3. 然后,把牛奶,油,与香草精搅拌进蛋黄。
4. 将玉米淀粉与面粉一起过筛,然后倒进蛋黄。搅拌成均匀。
5. 在另外一个碗里,将蛋白与4 1/2 tbsp 糖搅成软峰形式,拿起烘烤扫时,蛋白不会掉下来。
6. 将蛋白轻轻的搅拌进蛋黄,搅拌均匀。面糊不应该薄也不是水水的。
7. 将面糊倒入蛋糕模,烘烤大概25-30分钟直到蛋糕呈现金黄色。
8. 把蛋糕取出,让蛋糕冷却
9. 将鲜奶油与糖来打发变成奶油霜。
10. 切草莓成小片。
11. 蛋糕冷却后,把蛋糕放在烘焙纸上。在蛋糕上涂抹奶油霜,在最远的两旁留两寸。将水果撒上。
12. 小心提起蛋糕的一边, 然后开始卷。带有自信卷因为这样卷的时候,比较快也就不会让蛋糕裂成两半。
13. 将蛋糕像寿司一样包住,放在冰箱3hr。
14. 3hour 过后,取出,切成厚片,enjoy!


其实我从一开始就很想尝试做草莓瑞士卷,但就是不太敢下手。终觉得很困难,觉得是个遥不可及的日常甜点,害怕会毁了完成作品。既然现在是草莓的季节,而且有各种各样的草莓烘培料, 这就更不能错过了。在草莓最香甜的时候烘培,还真是人生享受。又与佩珊和俐璇一起烘培,这已逐渐变成了我们每一次相聚都会期待的原因。过后, 我们不但在佩珊的小厨房里一起做了晚餐,还继续做豆花塔。虽然已夜深人静,但我们的笑声填补了晚上的宁静。每当想起我们还小时所做过的蠢事,一定会让我们笑破肚皮。我们一起经历过的一切,还历历在目 — 我们8岁时的想法,我们一起向大人的疑问, 一起珍惜能够玩耍的时间,一起用功读书,能够到公园玩耍是一种奢侈。

这蛋糕超适合作为一天的完美结尾。邀请朋友一起做这蛋糕就不应该错过了,因为不只需要切水果,还得搅拌与组织。到最后,大家都能尝到所付出的成果。草莓与奶油搭配真的草好吃的!!


Read More

6/24/2016

Upside down plum cake / 反過來烤梅子蛋糕


"10 plums for $2" was everywhere in the market, who can resist not buying them? My mom and I went a little over the top because we bought 20 of them, but of course we gave them to our relatives and neighbours. This recipe won't hurt because it only calls for 4 plums and some ingredients found at your pantry. The rest of the plums can be use as afternoon bites. Recently, I started playing jazz music on my phone and place around the corner of my kitchen. Not only it managed to calm my senses down, it also made me more engaged in what I'm doing? It is weird. By the way, here a trick to choose plums. Whenever markets have large deals, it has a high chance that the better quality ones are already chosen. Hence its kind of important to choose what is best for you (?). For sweet plums, ensure that the plums is soft but tough enough to withstand pressure. If it is hard rock, it is still unripe so it can be really sour and tangy. However, plums that are overripe tend to be too soft which has a mushy texture, it is just unfavourable (bleh!).

This cake is perfect for gatherings, for yourself and the evening.


Ingredients: (recipe adapted from Martha Stewart )
9 tablespoons (1 stick, plus 1 tablespoon) unsalted butter, room temperature
1 cup packed light-brown sugar
4 red plums (about 1 pound), halved and pitted, each cut into 12 wedges
1 large egg
1/2 cup reduced-fat sour cream
1 cup all-purpose flour (spooned and leveled)
1/2 teaspoon baking soda
1/4 teaspoon salt
1 1/2 teaspoons cinnamon

Directions:
1. Preheat oven to 325 degrees.
2. Place 3 tablespoons butter in an 8-inch round cake pan; melt in preheating oven, about 4 minutes.
3. Sprinkle melted butter with 1/2 cup brown sugar. Arrange overlapping plum wedges in a circle around edge of pan; repeat in center, covering bottom of pan. Set aside.
4. In a large bowl, beat together remaining 6 tablespoons butter, remaining 1/2 cup sugar, and egg. Beat in sour cream until blended. Set aside.
5. In a medium bowl, mix together flour, baking soda, salt, cinnamon. Stir flour mixture into sour-cream mixture until just combined (batter will be thick).
6. Spread batter evenly over plums. Bake until a toothpick inserted in center of cake comes out clean, about 50 minutes.
7. Cool in pan 5 minutes. Run a knife around edge of pan; invert onto a serving plate.
8. Serve warm or at room temperature.

----------------------------------------------------------------------------------------------------

又到的梅子的季节了,这次在菜市场,一口气买了20粒梅子。我自己也觉得好夸张。但是10粒才两块钱耶,也太划算了!不买我一定会后悔。当然这么甜美的梅子,不送给亲戚与邻居们也太没意思了,分享美好也是简单的幸福。还好这蛋糕只许要4粒梅子,剩下的可以当点心去啃。平时不是很会吃梅子,但季节来临时,就回迫不及待的想些点子来充分吃到梅子的香甜。 最近不知道为什么,常常在厨房里播爵士音乐,不但让我更加专注于烘培,同时心情也放松了许多,好奇怪。让我告诉你选梅子的技巧吧!想用甜的梅子的话,梅子本生会有些柔软但还是抵挡的了时不时的磋磨。然而,非常酸的梅子,就硬的不得了!有些梅子非常非常软,说甜是甜,可是吃起来有个不舒服的口感,我也不知道怎么说。。

这蛋糕非常适合聚餐时平常,自己独处的时候,或安静的旁晚。

食材
9汤匙无盐奶油,室温
1杯浅红糖
4粒梅子,把种子去掉,切成片状
1粒蛋
1/2杯酸奶油
1杯面粉
1/2茶匙泡打粉
1/4茶匙盐
1 1/2茶匙肉桂粉

作法:
1.  预热烘炉于170度。
2. 将3汤匙牛油放进蛋糕模;让牛油在预热中的烘炉里融化。
3. 将1/2杯的汤撒在已融化的牛油,然后根据蛋糕模的形状排放梅子片(从最尾端开始)。放在一旁。
4. 在另外一个碗里, 将6汤匙牛油,与剩下的糖,鸡蛋,和酸奶油,一起均匀搅拌。放在一旁。
5. 另外,将面粉,泡打粉,盐与肉桂粉搅拌。把已经混合好的面粉搅拌进牛油的混合,然后充分搅拌,最后会呈现浓厚的面糊。
6. 将面糊铺在梅子上。放进烘炉,烤大约50分钟。
7. 如果牙签插进去,拿出来时没有面糊的话,就表示烤好了!
8. 与朋友和家人分享吧!


Read More

4/10/2016

double chocolate banana cake | 双倍巧克力香蕉蛋糕


Its the time of the year again, whereby my mom will request for a classic banana cake. "The banana is  too ripe to be eaten, hurry up and bake them!" "They will go rotten if you leave them there!" "If you want to waste those precious bananas then go ahead, don't regret." Yeap, those are the little things my mom would say to sort of remind me the existence of the bananas. The reason why my mom is always so anxious to bake those ripe bananas away was because two bananas actually got so ripe that it "bled" juice in the fridge, which made the whole fridge sticky and bad smelling. So yeah, which kind of left an impression of the fearful ripe bananas.

Chocolates work amazingly well with bananas.

Ingredients:
160g unsalted butter
4g salt
4 eggs
46g corn flour
2 bananas
1tsp vanilla extract
170g granulated sugar
120g plain flour
1tsp baking powder
40g chocolate chips
16g cocoa powder

Directions:
1.  Preheat oven at 200°C and place baking paper into a 8x15.5cm cake pan.  Place butter, sugar, salt and vanilla extract in a large bowl, mix till incorporated.
2. Then pour in eggs and mix.
3. Sieve the plain flour, corn flour and baking powder into the mixture. Incorporate well.
4. Remove skin of bananas and mash it. Along with chocolate chips and walnuts, pour into mixture.
5. Mix well but not too much or else it will be a dense cake.
6. Lastly, pour in cocoa powder and mix carefully.
7. Bake for 15-30mins depending on your oven till golden brown.

Enjoy!


前几天买回来的香蕉又很快的变熟了,当然,我妈也会不停地唠叨我去做香蕉蛋糕。这蛋糕简单又美味,虽然香蕉是看起来有点腐烂了,但请不要被那外表而受骗哦。我用了基本做蛋糕的材料,肯定在家家户户都找得到的食材。不一定得用香蕉,蓝莓或柠檬都行,只是得调一下糖的使用量。每当开始做香蕉蛋糕时,心里是有点纠结,到底巧克力配搭香蕉会不会盖掉香蕉的香甜味。因此,我等到现在才放心的去尝试。

吃了一口后,觉得自己好奇怪哦,怎么等到今天才试呢!

材料:
奶油 160g
盐 4g
鸡蛋 4颗
玉米粉 46g
香蕉 2根
香草油  1茶匙
糖 170g
低筋面粉 120g
泡打粉  1茶匙
巧克力碎片 40g
可可粉 16g

作法:
1. 将奶油,糖,盐与香草油放入锅中,搅拌至呈淡象牙色。
2. 打入鸡蛋搅拌。
3. 将过节的面粉,玉米粉与泡打粉放入步骤2的锅中,以刮刀拌均。
4. 将去皮的香蕉,巧克力碎片放入步骤3的锅中,轻轻搅拌。
5. 再加入可可粉搅均。注意不要搅拌太久,以免残生过多面筋而变黏,也当然呈现出硬邦邦的蛋糕。
6. 将2面糊放入8X15.5CM 的磅蛋糕模内。
7. 放入200°C预热的烤箱中,烤约15-30分钟,至表面呈金黄色。

让我们幸福的吃吧!


Read More